How to Draw a Dachshund
Dog lovers are truly spoilt for choice when it comes to dog breeds to choose from! Whether they love big dogs or small cute ones, there are many different options to fall for.
One of the most popular breed choices is also one of the most unusual-looking, and that would have to be the dachshund.
These cute dogs are known for their long bodies, small limbs and tenacious personalities.
Owning one of these cuties is a real joy, and learning how to draw a dachshund is a great way to celebrate this adorable breed!
If you love these cute dogs, then this will be a tutorial that's not to be missed.
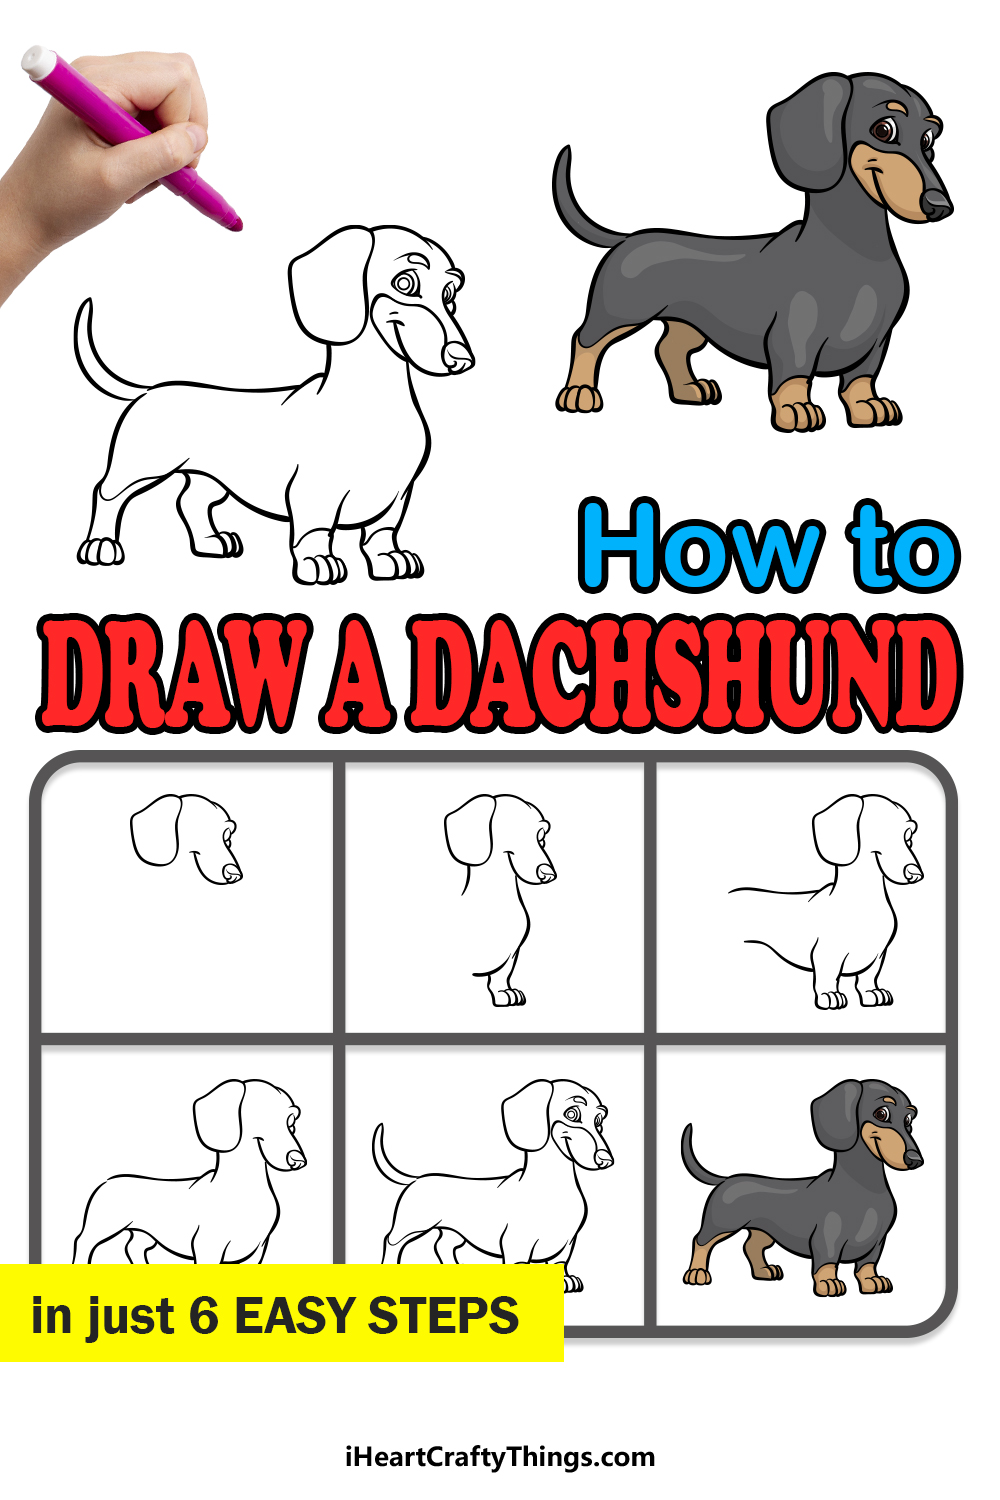
Our step-by-step guide on how to draw a dachshund in just 6 easy steps will show you how to recreate this famous breed in no time!
What's in this Blog Post
- How to Draw A Dachshund – Let's Get Started!
- Step 1
- Step 2 – Now, draw the chest and start the back of the dachshund
- Step 3 – Draw another leg and more of the body
- Step 4 – Next, draw the back legs for the dachshund
- Step 5 – Add the final details to your dachshund drawing
- Step 6 – Finish off your dachshund drawing with color
- Your Dachshund Drawing is Complete!
How to Draw A Dachshund – Let's Get Started!
Step 1
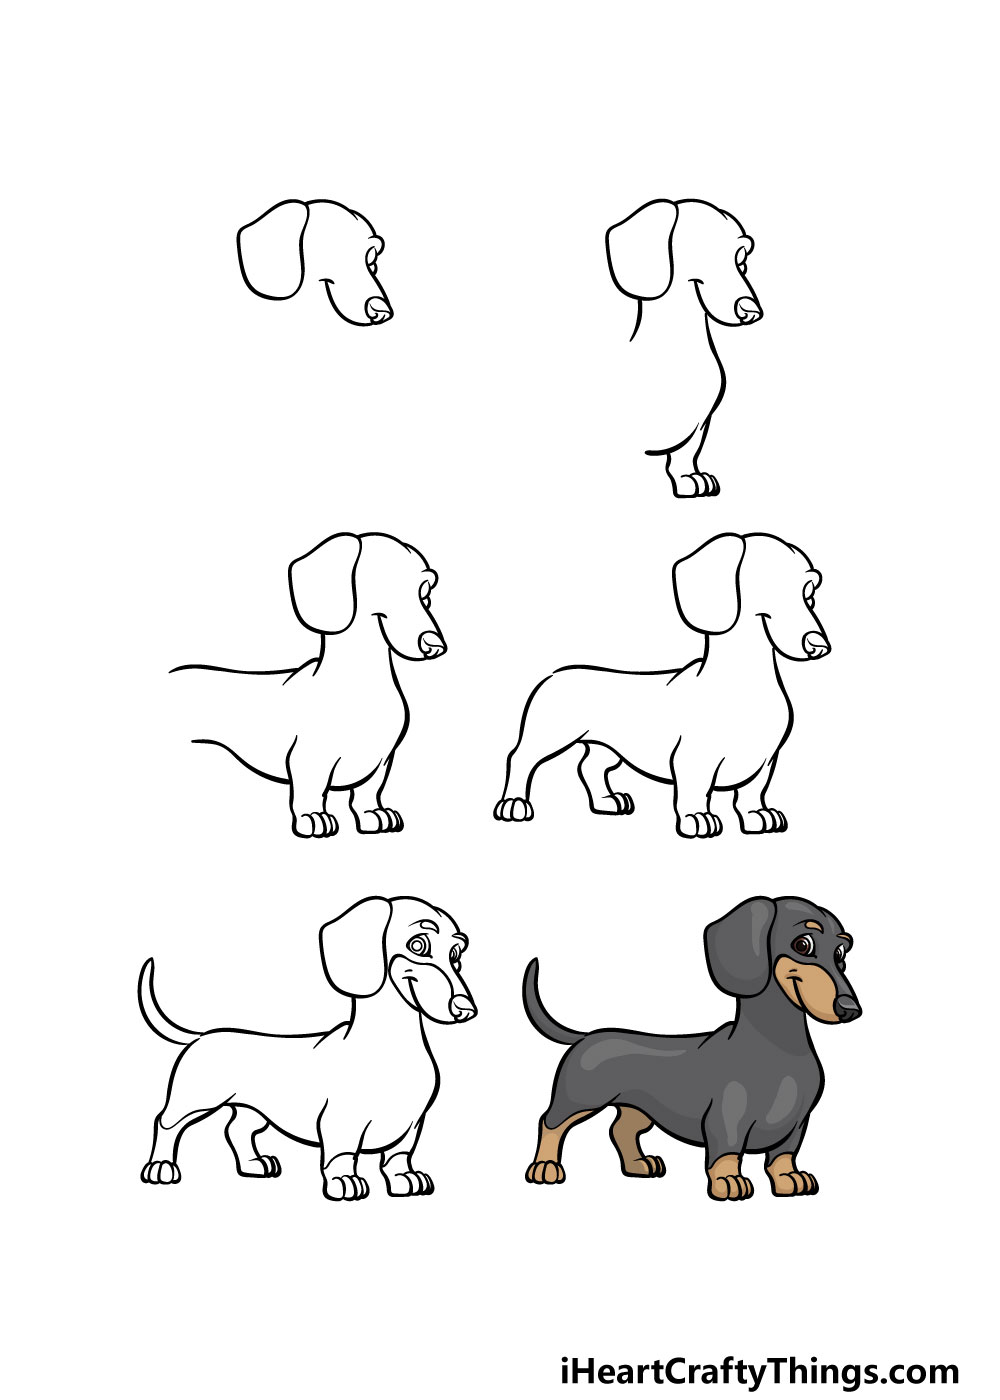
For the first step of this guide on how to draw a dachshund, we will be focussing on the head and face of the dog.
Dachshunds have a rather distinctive look to them, and this includes a long, thin muzzle and large ears that flop down around their faces.
You can start by drawing a large rounded shape for the ear on the left. Then, use some curved lines connecting to one another for the top of the head.
This will then extend into a longer line for the muzzle.
At the end of this muzzle, we will be drawing a relatively large nose. To finish off this step, draw a long, smiling mouth extending to the left from beneath the nose.
That's all there is to it for this step, so now you can move on to step 2!
Step 2 – Now, draw the chest and start the back of the dachshund
This second step of your dachshund drawing will see you adding some details for the chest, back and first leg. First, extend a slightly curvy line down from the base of the head.
There will then be a short little leg coming down from that with some small curved toes at the base. Then, draw a smaller curved line for the chest near this leg.
Then, we will draw the start of the dachshund's back. This will simply be a small curved line coming down from the base of the back of the head.
Once these details have been drawn, we shall proceed to step 3 of this guide.
Step 3 – Draw another leg and more of the body
In this third part of our guide on how to draw a dachshund, we will be adding the other front leg along with more of the body.
First, let's start with that leg. This one will go beside the first one, and it will look very similar to that first one. Then, we will be adding some curved lines for the back and the belly of the body.
The line for the back will be a bit straighter than the one for the belly, as the belly line will curve sharply inward near the end.
Step 4 – Next, draw the back legs for the dachshund
Now you will be drawing the back legs of this dachshund drawing in this fourth step. The back legs will look rather similar to the front ones, but they will be a bit longer than those ones.
The legs at the back will also be further apart, and positioning them this way helps to give this adorable dachshund a more confident look!
Once you have finished drawing these back legs, you will be ready to add some final details and elements in the next step of the guide.
Step 5 – Add the final details to your dachshund drawing
Now you're ready to add the final details of this picture in this fifth step of our guide on how to draw a dachshund. To get this started, we will be drawing the second eye outline on the left.
You can then add some small circular shapes inside of each eye for the pupils. Then, add some curved eyebrows above the eyes and a curved line around the mouth.
Finally, add a nice little curved tail to the back of the dachshund extending upward. When you have added these details, you can finish off with your own final touches!
Drawing a background would be just one idea for how you can finish it off, and if you were to go for that then what kind of setting would you choose for this adorable dachshund?
Step 6 – Finish off your dachshund drawing with color
This breed of dog has a lovely color scheme of alternating dark and light browns, and this is the approach we went with in our example for this dachshund drawing.
When coloring your own depiction, you could use our example as a blueprint when coloring so that you can get a realistic look for your dachshund.
When coloring any picture, part of the fun comes in choosing the art mediums you will use to achieve your color choices.
You could go for some painterly mediums or some brighter mediums such as colored pens depending on the mood you would like for the image.
How do you think you will color in this amazing picture?
Your Dachshund Drawing is Complete!
That brings you to the end of this guide on how to draw a dachshund!
We hope that you had a fun time recreating this adorable little dog, and we also hope that this guide made it easier than you may have expected!
Drawing is always made easier when you have some steps to follow, and this is what we aimed to provide for you in this guide.
When you have finished this drawing, you can also keep the fun going by adding your own details, elements and ideas.
We mentioned a few ways you could get creative with additional details and color choices, but what else can you think of to finish it off?
If you're ready for more drawing fun after finishing this one, you can find many more drawing guides to enjoy on our website.
We have a huge selection that is constantly growing, so keep checking in to make sure you never miss out!
It would be amazing to see your finished dachshund drawing, so please share your creation on our Facebook and Pinterest pages for us to enjoy!
Source: https://iheartcraftythings.com/dachshund-drawing.html
0 Response to "How to Draw a Dachshund"
Post a Comment